
Understanding Side Window Replacement
What is Side Window Replacement?
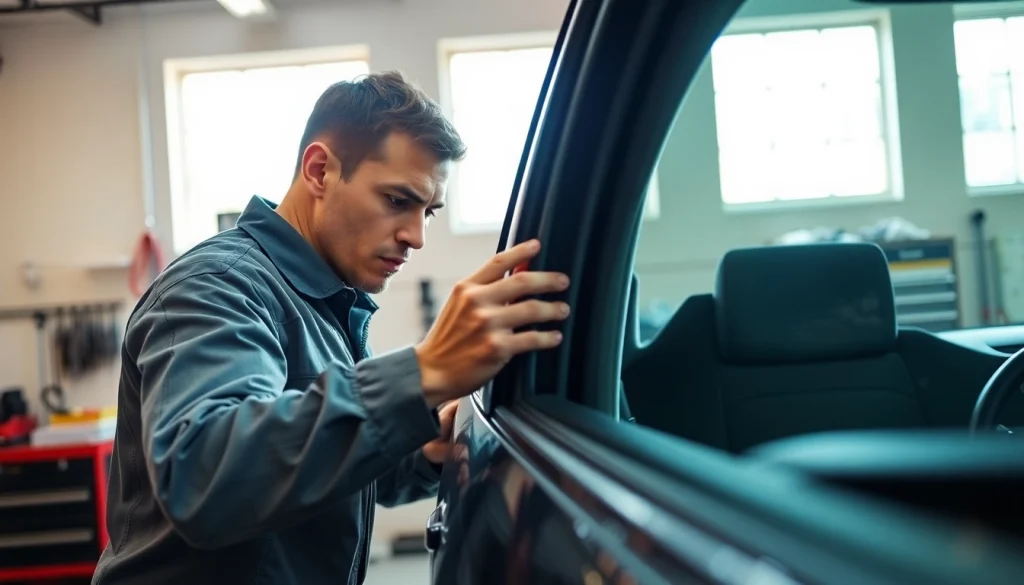
Side window replacement refers to the process of removing a damaged or broken side window from a vehicle and installing a new one. This can be necessary due to various reasons, such as accidents, vandalism, or wear and tear over time. The side window is crucial for maintaining vehicle integrity and safety, providing structural support and visibility for the driver. While many car owners attempt DIY repairs, professional side window replacement services ensure the use of quality materials and expertise for a successful installation.
Signs You Need Side Window Replacement
Identifying the need for Side window replacement is essential for vehicle safety. Here are some common signs:
- Cracks and Chips: Small chips can often be repaired, but extensive cracks or shattering necessitate immediate replacement.
- Visibility Issues: If the glass is fogged, tinted improperly, or damaged to the point where visibility is compromised, replacement is crucial.
- Window Malfunctions: Issues such as power windows that won’t open or close, or manual windows that are stuck, often indicate underlying problems with the glass or mechanics that may require replacement.
- Seal Failure: Water leakage during rains or humidity inside the vehicle points to failed window seals, needing a full window replacement to restore integrity.
Importance of Professional Side Window Replacement
Choosing a professional service for side window replacement rather than doing it yourself can yield numerous benefits:
- Expertise: Trained professionals can identify the correct glass type and installation technique suitable for your specific vehicle model.
- Warranty Protection: Many professional services offer warranties on their work, protecting you against future defects.
- Safety Compliance: Professional installers adhere to safety standards, ensuring the new window contributes effectively to the vehicle’s structural integrity.
- Efficiency: Professionals can complete the replacement task much faster than an untrained individual, minimizing vehicle downtime.
Choosing Quality Materials for Side Window Replacement
Types of Glass Used in Side Window Replacement
The type of glass used significantly influences the durability and performance of a side window. There are typically two main types of glass:
- Tempered Glass: This is the most common type of glass used for side windows. It is heat-treated to be stronger than regular glass and, when shattered, breaks into small, blunt pieces rather than sharp shards, enhancing safety.
- Laminated Glass: Although more commonly used for windshields, laminated glass can also be used for side windows. It consists of two layers of glass bonded together with a thin layer of polyvinyl butyral (PVB), providing better sound insulation and UV protection.
Benefits of OEM vs. Aftermarket Windows
When considering a side window replacement, the choice between Original Equipment Manufacturer (OEM) and aftermarket parts can affect quality and cost:
- OEM Parts: Sourced directly from the vehicle’s manufacturer, OEM parts are designed to match the exact specifications of your vehicle. They ensure fit, function, and aesthetic continuity.
- Aftermarket Parts: These parts may be less expensive but can vary in quality. It’s crucial to choose reputable manufacturers to avoid poor-fit or inferior performance issues.
Evaluating Durability and Performance
When selecting materials for side window replacement, consider factors reflecting durability and overall performance:
- Safety Ratings: Check if the glass meets local safety standards, which can provide insight into quality and durability.
- Weather Resistance: Look for glass that can withstand various weather conditions without warping or degrading.
- UV Protection: Quality glass should block harmful UV rays, protecting the vehicle’s interior and passengers.
Step-by-Step Guide to Side Window Replacement
Preparation Steps Before Replacement
To ensure a successful side window replacement, follow these preparation steps:
- Gather Documentation: Refer to the vehicle’s manual for specifications regarding the type of glass needed.
- Assess the Damage: Determine the extent of the damage to decide whether replacement is necessary.
- Clear Work Area: Prepare a clean and organized workspace, minimizing obstructions and hazards during the replacement.
Tools Required for Side Window Replacement
Having the right tools makes the replacement process more efficient and minimizes the risk of further damage. Essential tools include:
- Glass suction cups
- Utility knife
- Black adhesive sealant
- Safety gloves and goggles
- Trim removal tools
Executing the Replacement Safely
Once you’re prepared, follow these steps to execute the side window replacement:
- Remove any trim or panels surrounding the damaged window carefully to avoid breaking them.
- Use suction cups to pull the glass out gently. If there is adhesive, carefully cut through it using a utility knife.
- Clean the window frame thoroughly, removing any remnants of old adhesive.
- Apply a new adhesive sealant around the edge of the window frame before placing the new glass.
- Carefully position the new side window and press it into place, ensuring it sits evenly in the frame.
- Replace any panels and trim that were removed during the process, ensuring they fit snugly.
- Allow the adhesive to cure as per the manufacturer’s instructions before using the vehicle.
Common Mistakes to Avoid in Side Window Replacement
Misjudging Compatibility with Vehicle Model
One of the most common mistakes in side window replacement is selecting the wrong glass type. Each vehicle model has specific requirements, and using incompatible glass can lead to numerous problems, including structural issues and unsafe driving conditions. Always double-check model compatibility before making a purchase.
Overlooking Sealant Application
Failing to apply an adequate sealant can result in leaks that damage the vehicle’s interior. Using high-quality adhesives and ensuring an even application around the entire perimeter of the window is crucial for preventing future issues.
Ignoring Regulatory Standards and Compliance
Each region has auto glass replacement laws and regulations. Ignoring these guidelines can not only lead to legal issues but also impact your safety. Always familiarize yourself with local laws regarding vehicle glass standards.
Maintenance and Care After Side Window Replacement
Best Practices for Protecting New Side Windows
Once your side window is replaced, ensuring its longevity is vital. Here are some best practices:
- Avoid rolling down the window for at least 24 hours post-installation to allow adhesive to set properly.
- Regularly clean the new window with appropriate glass cleaners to avoid scratches and deterioration.
- Prevent exposure to extreme temperatures immediately after installation since this can affect the bond.
Understanding Warranty and Repair Options
Many installers offer warranties on their work, covering defects and leakage issues. Review warranty terms to understand what is and isn’t covered along with repair options should issues arise shortly after replacement.
Signs of Potential Issues Post-Replacement
Monitor your newly installed side window for any signs of trouble:
- Visible gaps between the window and frame.
- Water leaks during rains or when cleaning the car.
- Rattling sounds while driving, indicating a loose fit.
Addressing these issues promptly will not only enhance safety but also prolong the life of the new window.